|
Teensy Wavetable Synthesis
|


|
|
Teensy Wavetable Synthesis
|
|
This document is a user guide for the SF2 decoder created for the Wavetable Synthesis Capstone project at Portland State, Fall 2016 - Winter 2017. The decoder described in this document is meant to take SF2 files and translate them into a format that can be used with the AudioSynthWavetable library for use on the Teensy 3.2 and 3.6.
More information about the AudioSynthWavetable library can be found at: https://github.com/TeensyAudio/Wavetable-Synthesis
More information about the Teensy 3.2 and 3.6 can be found at: https://www.pjrc.com/teensy/index.html
Python 3.6 is required for the decoder to operate properly.
Information about installing Python can be found at: https://www.python.org/downloads/release/python-360/
The sf2utils library is also required for the decoder to operate.
To install sf2utils you can use the following command:
pip install sf2utils
Further installation instructions and information about sf2utils can be found at: https://pypi.python.org/pypi/sf2utils
The following section covers what each component of the GUI does.
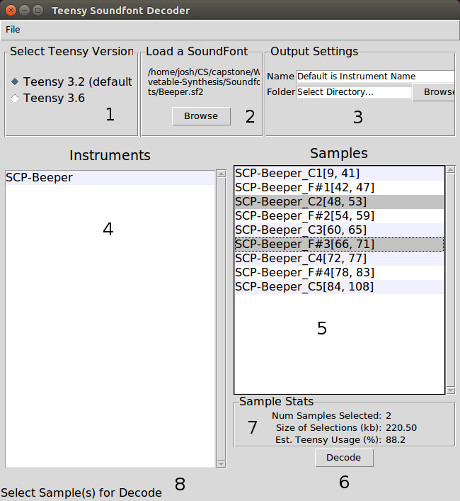
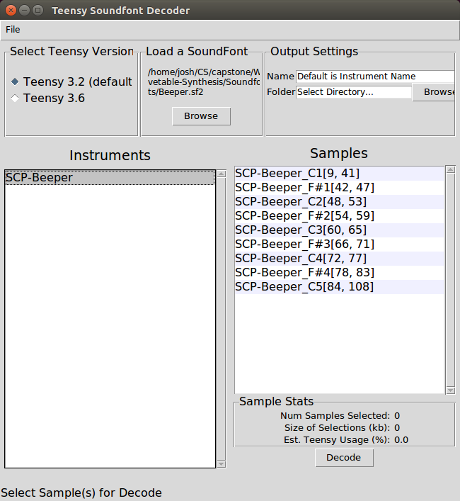
.sf2 extension to load into the decoder. Once a file is selected the file path will is displayed here as well..sf2 file is loaded into the decoder all the instruments contained in the file will be listed here. Clicking on an instrument in this window will bring up its samples in the samples window.ctrl and clicking on each one. A sample is selected when it’s highlighted This window also displays a confirmation message and list of decoded samples when samples have been successfully decoded.This section gives a basic walk through of loading a .sf2 file, selecting a sample and decoding it with the GUI.

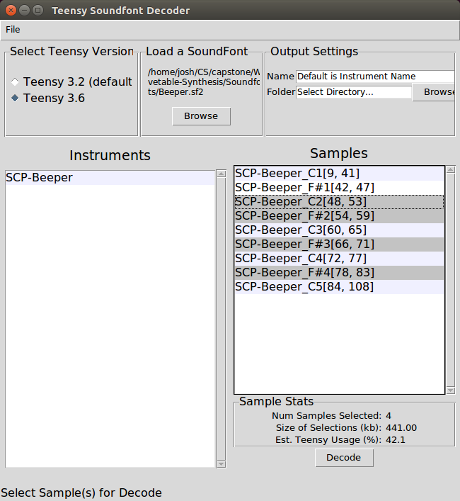
Note: The selected samples are shown in grey. Also multiple samples can be selected if the ctrl button on the keyboard is held during sample selection.
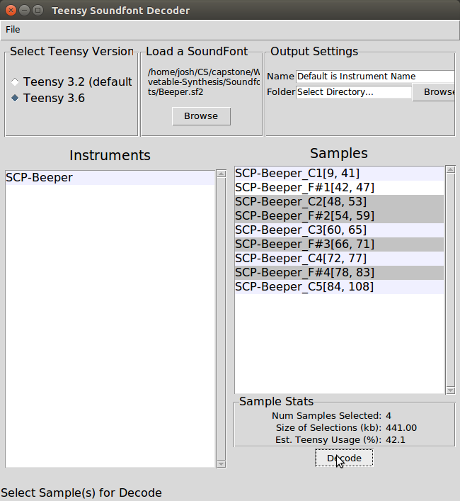
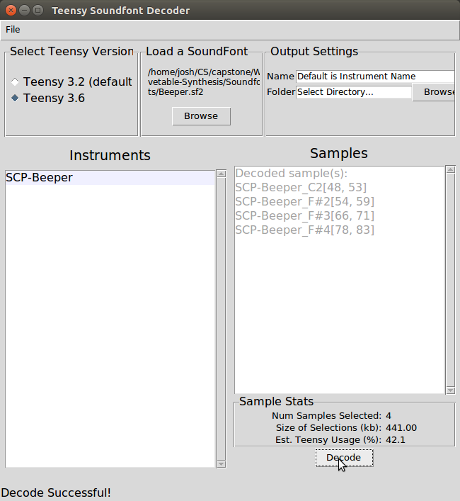
Note: The confirmation message is displayed in the status bar. (bottom right)
At this point the decoded sample files (.cpp and .h) will be in the output directory and will be named after the selected instrument. By default this directory is the same that the decoder was launched from.
This section gives a basic walk through of starting the decoder, loading an .sf2 file, selecting a sample and decoding it from the command line.
.sf2 fileThe following shows how to start the decoder with a file Example.sf2
python3 decoder.py -i Soundfonts/Example.sf2
.sf2 fileWELCOME 1. Select by Instrument 2. Quit Select [1-2]: 1
1. string
2. bass
3. tom
4. mood

Select Instrument [1-4]: 3
1. Export All Samples
2. Select Samples to Export

Select [1-2]: 2
Alternatively, the option to decode all samples could be chosen and a confirmation message would be displayed before exiting the decoder.
1. mood2
2. mood3

Select Sample [1-2]: 2
1. Select Again
2. Save and Quit

Select [1-2]: 2
Selected samples for instrument decoded successfully. Exiting Program.
Following step 6 the decoded sample files (.cpp and .h) will be in the output directory and will be named after the selected instrument. By default this directory is the same that the decoder was launched from.
There are 2 options available when running the decoder from the command line. -i is the input flag. This option is mandatory for proper operation of the decoder and must precede the name of the .sf2 input file. -d is the debug flag. This should only be used when making changes to the decoder and debug info is needed.
This sections gives a brief overview of what is found in the output files created by the decoder.
This file contains a sample_data structure that contains metadata for each sample that was extracted from the .sf2 file. Following the sample_data structure is all of the sample arrays holding the audio data. The samples in this file are organized by key range values in ascending order.
This file contains extern declarations for all of the sample arrays in the .cpp file as well as a declaration for the structure that holds the metadata.
This is the file that will be included using a #include statement in an Arduino sketch file so that the samples are available.
 1.8.11